You can click ![]() to edit the video contents before processing format conversion. There are six functions available: Trim, Crop, Text Watermark, Image/Video Watermark, Effect, and Audio Replace.
to edit the video contents before processing format conversion. There are six functions available: Trim, Crop, Text Watermark, Image/Video Watermark, Effect, and Audio Replace.
![]()
Trim: Select video durations by setting the start time and the end time.
Crop: Cut off black edges and unwanted areas.
Text Watermarking: Add text to the video as watermarks.
Image/Video Watermarking: Add image or video to the source video as a watermark.
Effect: Adjust brightness, contrast, saturation of the video, and add special effects to the video.
Replace audio track: Take place of the original audio track with your specified sound track.
Trim Video
By using trim function, you can select your favorite video clips to convert at will.
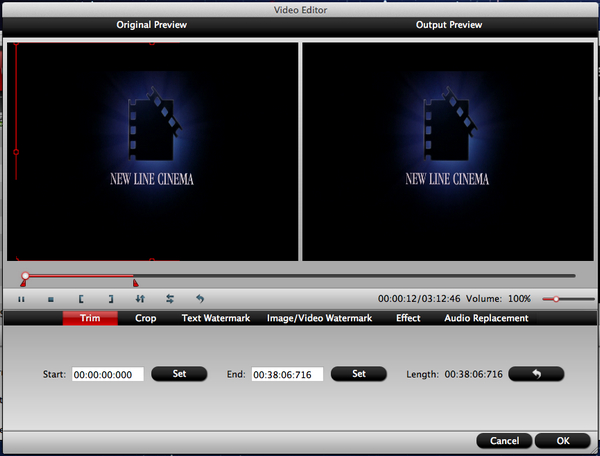
There are three ways available to trim video clips:
1. Drag the slider bars
Drag ![]() icon to mark the beginning point of your clip and drag
icon to mark the beginning point of your clip and drag ![]() to mark the end point of your clip during the preview.
to mark the end point of your clip during the preview.
2. Control mark buttons
Press the button ![]() to mark the starting point of your clip and press
to mark the starting point of your clip and press ![]() to mark the ending point of your clip during the preview.
to mark the ending point of your clip during the preview.
3. Enter time digits
Input the certain time digits into “Start” and “End” fields.
Crop Video
By using crop function, you are able to cut off black edges as well as any unwanted areas of the source video. The “Output Preview” window will show you the final effect of your modification, so you can change your adjustment in real time.
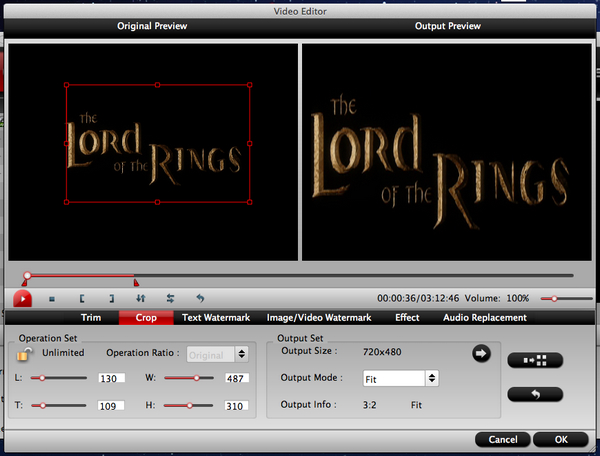
There are two ways available to crop video contents:
1. Crop by adjusting the cropping frame
There are eight small adjusting boxes on the cropping frame. Each adjusting box allows you to crop the video from a different position. You can movie your mouse cursor onto an adjusting box and drag the frame line.
2. Crop by setting the values and dragging the slider bars
Type values into the boxes after “Left”, “Top”, “Width” and “Height” to crop your video. You can also drag the slider bars below the four options to customize your cropping.
Add Text Watermark
Under “Text Watermark” tab, tick off “Enable” option, and then you can type your wanted texts as watermark.
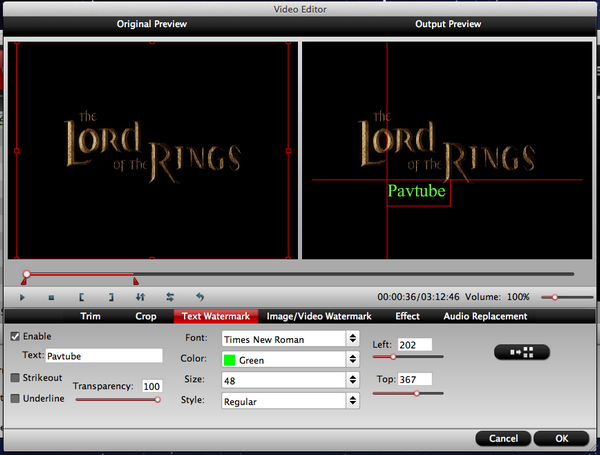
1. Check option “Enable” to edit text watermark.
2. Type the text you want to use as watermark in text watermark area.
3. You can add “Strikeout” and “Underline” effects to the text watermark by ticking off “Strikeout” and “Underline” option.
4. Drag the slider bar of “Transparence” to adjust transparence.
5. Customize “Font”, “Color”, “Size”, and “Style” of the text.
6. Drag the slider bars of “Left”, “Top” to adjust the location of the text watermark.
Add Image/Video Watermark
Click “Image/Video Watermark” button to come into the image/video watermark editing window to realize a picture-in-picture effect.
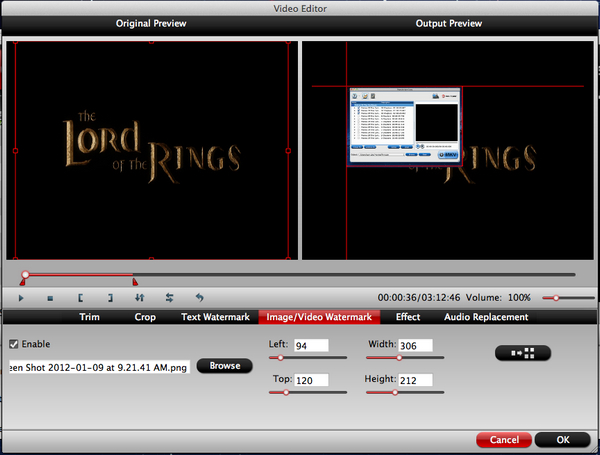
1. Check option “Enable” to edit image or video watermark.
2. Click “Browse” button to select the image or video file you want to use.
3. Set the image/video position by dragging the slider bars of “Left” and “Top”
4. Resize the height and width of the image/video by dragging the slider bars of “Width” and “Height”.
Effect
Under “Effect” tab, you can adjust the effects by adjusting the following parameters:
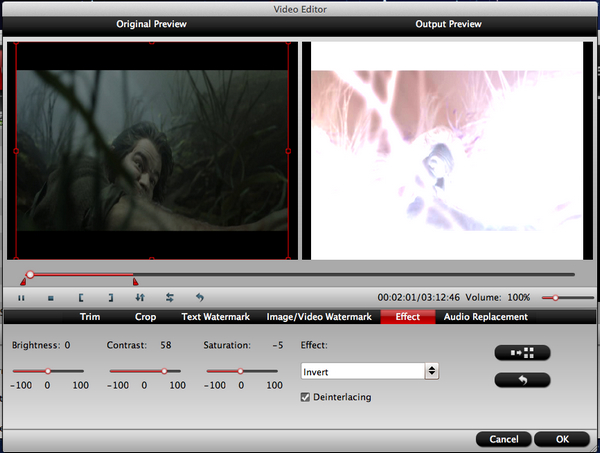
Brightness: Drag the slider bar of “Brightness” to adjust the brightness of the image/video.
Contrast: Drag the slider bar of “Contrast” to adjust the contrast of the image/video.
Saturation: Drag the slider bar of “Saturation” to adjust the saturation of the image/video.
Volume: Drag the slider bar of “Volume” to adjust the volume of the audio.
Deinterlacing: If there are some stripes on the picture, you can check this option to make a better picture effect. (Checked by default)
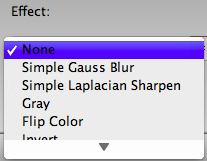
Effect: Choose a special effect from the Effect drop-down list. There are many available choices including Simple gauss blur, Simple laplacian sharpen, Aged film, Flip color, Invert and None.
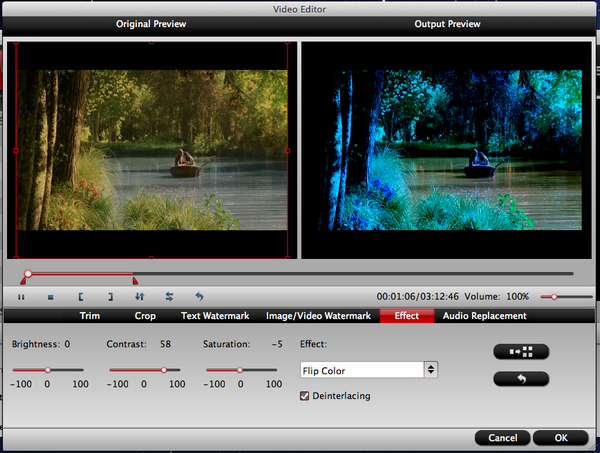
Following interface shows the effect of “Flip Color”:
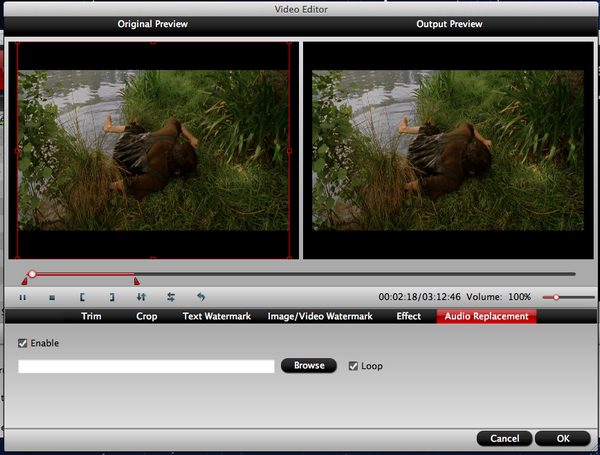
Audio Replace
Under “Audio Replace” tab, check “Enable” option, and hit the “Browse” button to select the audio file you want to use as audio track. The “Loop” option is checked by default, if you needn’t loop, just remove the checkmark.

 Home
Home


