Subtitle plays an important role in a movie, which helps people to get a much better understanding about the movie. However, sometimes when you try to play one MKV file with integrated subtitles downloaded from the internet via VLC media player but VLC it shows the message to you: "VLC could not identify the audio or video codec." And you try to turn on subtitles, that message pop again and subtitles don't showing.
4 Solutions To VLC MKV Integrated Subtitles Error
I think I have some useful tricks to share with you to play MKV in VLC beautifully without hassle.
Solution 1: Change Parameters
If the MKV file that is skipping is playing from a local hard drive, choose the "All" settings at the bottom of the dialog to show all of the options, then navigate to Input / Codecs -> Access modules -> File.
The caching value here is set in milliseconds, so setting the value to 1000 will buffer for 1 second (the default is 600, or 0.6 seconds). The problem with setting this option too large is that if you want to manually skip to a new point in the file, there will be a larger lag while the content is buffered again.
Solution 2: Disable hardware decoding
Some users resolve choppy VLC Playback on mkv files by disabling hardware decoding. Normally you would want hardware acceleration of the decoding process, but in some cases, it can conflict with your drivers, and it is worth a try.
Solution 3: Find VLC player alternative
Media Player Classic is a compact media player which serves as an alternative to VLC player for Microsoft Windows. For Mac users, you can try MXplayer.
Solution 4: Convert MKV to VLC most friendly format
Since MKV can't be supported well by VLC media player, an ultimate solution is to convert MKV to VLC most friendly format. Pavtube Video Converter Ultimate is the utility for you. With it, you can fast convert MKV to AVI that can be easily played in VLC.
Key Features You Should Not Miss - Pavtube Video Converter Ultimate
-->Convert MKV to AVI, MOV, M4V, MP4, etc with 30X conversion speed.
-->Hundreds output optimized devices presets including: Apple devices, Android devices, Windows devices, game console, media playes and others.
-->Features-rich editing tool allows you to trim the video length, adjust video brightness, add image/text watermark, best of all, adding external subtitles is also available here. You also can remove or replace the audio, and insert the audio track you wanted.
-->Recently, Pavtube converters has upgraded to v4.9.2. See more functions here.
Hot Guide Link: Use VLC Player to Download & Add Subtitles | Remove Subtitles from MKV Video Smoothly
Quick Guide To Convert MKV To AVI More Compatible With VLC
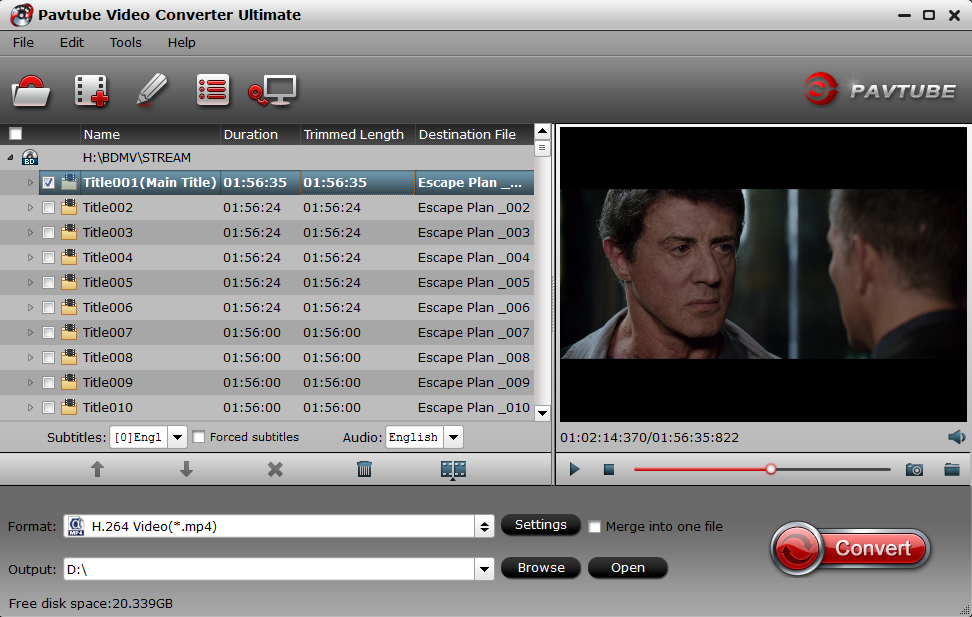
Step 1: Launch this assistant on your Windows, click the "Load file" or "Add Video" icon on the main interface to import MKV file into the program. Or you can directly drag or drop video into this converter. Batch conversion is also available here.

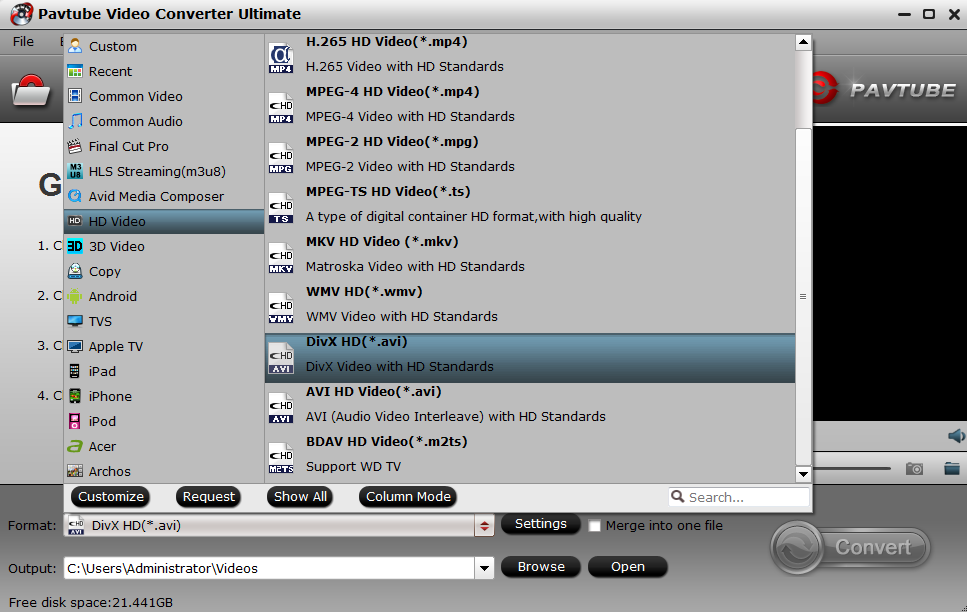
Step 2: Click "Format" bar, you will see hundreds of video format here. You can navigate to "HD Video" and select "AVI HD Video(*.avi)".

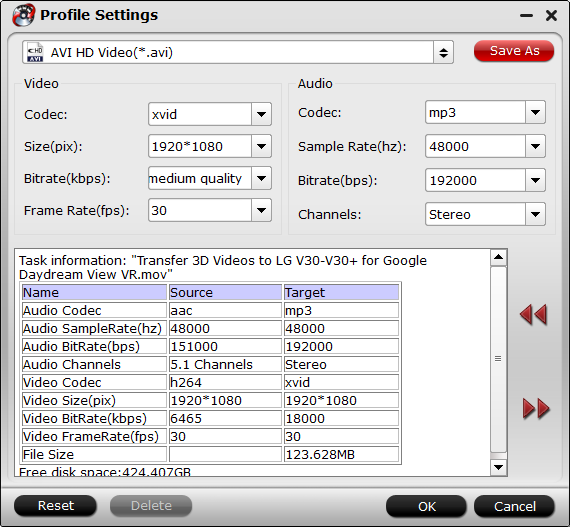
Step 3: After you have decided AVI as output video format, now you can click Settings to do further video parameters change. You are allowed to change A/V codec, video size, bit rate, frame rate, channels, and more.

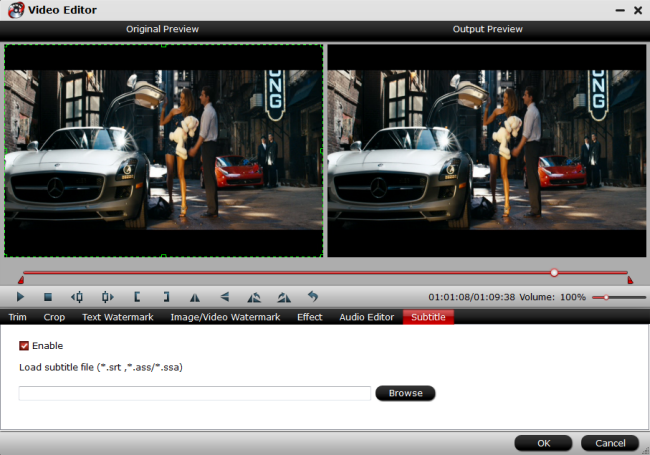
Step 4: Find the pen icon on the main UI, you will entre the video editing windows. It allows you to add subtitles, add image/text watermark, remove or replace the audio as you like.

Step 5: Click on "Convert" button and the program will rip MKV to AVI conversion for you very soon. Once the conversion stops, click Open to locate the generated file. Now you can transfer the file to your PC or Mac for playback on VLC media player with subtitles without any hassle.
Useful Tips
- Solve VLC MKV Integrated Subtitles Error
- Watch 3D Movies on ASUS Windows Mixed Reality Headset
- Top 10 VidCoder Alternatives
- 10 Places to Get 4K Ultra Movies and TV Show for 4K TV
- Get A Way to Play ISO Files on Samsung TV From USB or NAS
- Upload ISO Files to Google Drive for Accessing on Smartphone or Tablet

 Home
Home

 Free Trial Video Converter Ultimate


